Giới thiệu về lập trình Android (Bài 1)
Giới thiệu về lập trình Android sẽ cho các bạn biết Android là nền tảng phần mềm mã nguồn mở được Google và Open Handset Alliance tạo ra.
Các dịch vụ hệ thống cơ bản của Android được xây dựng trên Linux 2.6. Android SDK cung cấp công cụ và API để phát triển ứng dụng Android sử dụng ngôn ngữ Java.
Giới thiệu về lập trình Android – Giới thiệu Android
Open handset alliance
Liên minh gồm trên 80 công ty cùng xây dựng nền tảng mobile mới (Android)
Lịch sử phát triển của Android
Các phiên bản chính của Android
So sánh các nền tảng mobile platform
Kiến trúc Android
Nhân Linux
Android dựa trên Linux version 2.6 gồm các dịch vụ hệ thống cơ bản như bảo mật, quản lý bộ nhớ, quản lý tiến trình, network và driver.
Nhân linux là tầng trừu tượng giữa phần cứng và software stack.
Thư viện
Android bao gồm tập hợp các thư viện C/C++ sử dụng bởi các thành phần khác nhau của Android System.
Nhà phát triển khai thác thư viện này thông qua Android application framework. Một số thư viện cơ bản được liệt kê ở dưới.
Application
Các phiên bản Android bao gồm các ứng dụng cơ bản như email, sms, calendar, map, contact,… Tất cả ứng dụng được viết bằng ngôn ngữ lập trình Java.
Giới thiệu về lập trình Android – Môi trường phát triển Android
Android Development Tools (ADT) plugin cho Eclipse để phát triển Android. Cho phép tạo và gỡ lỗi ứng dụng Android dễ dàng và nhanh chóng.
Google đang phát triển IDE mới cho Android có tên là Android studio IDE. Phiên bản hiện tại là Android Studio 1.5.1 (Tính đến tháng 11/01/2016)
Yêu cầu hệ thống
Đối với hệ điều hành Windows
- Microsoft® Windows® 8/7/Vista (32- or 64-bit)
- 2 GB RAM minimum, 4 GB RAM recommended
- 400 MB hard disk space
- At least 1 GB for Android SDK, emulator system images, and caches
- 1280 x 800 minimum screen resolution
- Java Development Kit (JDK) 7
- Optional for accelerated emulator: Intel® processor with support for Intel® VT-x, Intel® EM64T (Intel® 64), and Execute Disable (XD) Bit functionality
Đối với hệ điều hành Mac OS X
- Mac® OS X® 10.8.5 or higher, up to 10.9 (Mavericks)
- 2 GB RAM minimum, 4 GB RAM recommended
- 400 MB hard disk space
- At least 1 GB for Android SDK, emulator system images, and caches
- 1280 x 800 minimum screen resolution
- Java Runtime Environment (JRE) 6
- Java Development Kit (JDK) 7
Đối với hệ điều hành Linux (Ubuntu® 14.04)
- GNOME or KDE desktop
- GNU C Library (glibc) 2.15 or later
- 2 GB RAM minimum, 4 GB RAM recommended
- 400 MB hard disk space
- At least 1 GB for Android SDK, emulator system images, and caches
- 1280 x 800 minimum screen resolution
- Oracle® Java Development Kit (JDK) 7
- 64-bit distribution capable of running 32-bit applications
1.Tải và cài đặt JDK (Nếu máy tính chưa được cài)
2. Tải và cài đặt Android Studio
Giới thiệu về lập trình Android – Tạo Android project sử dụng Android Studio
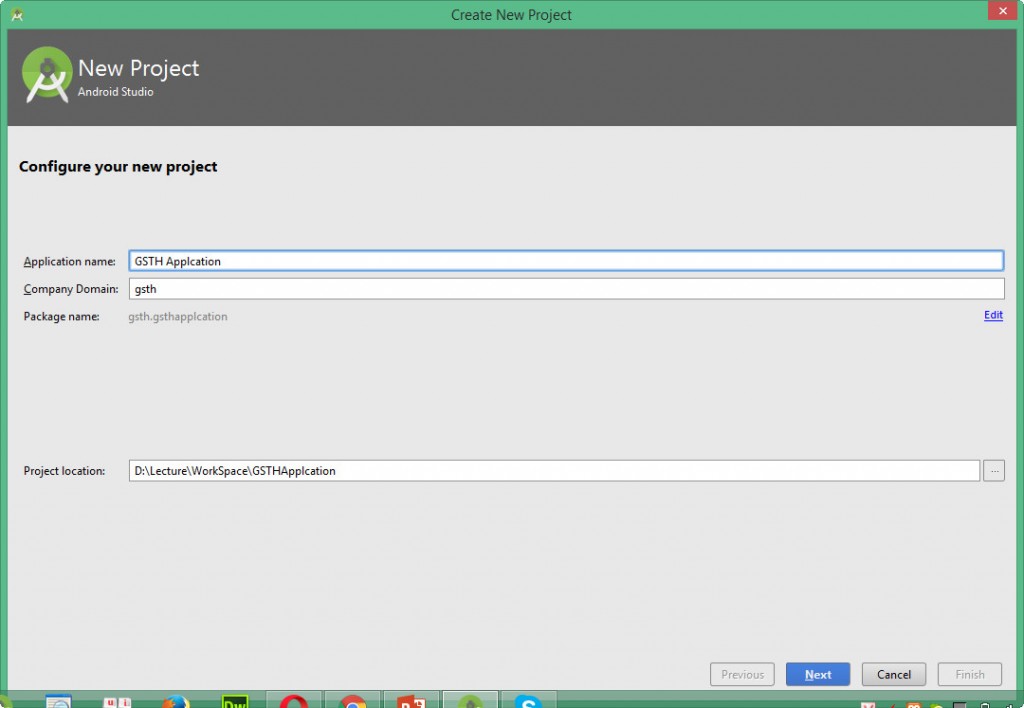
Khởi động Android Studio -> Chọn File -> New -> New Project
- Nhập Application Name
- Nhập Company Domain
- Chỉ định thư mục chứa project tại Project Location
Chọn Next
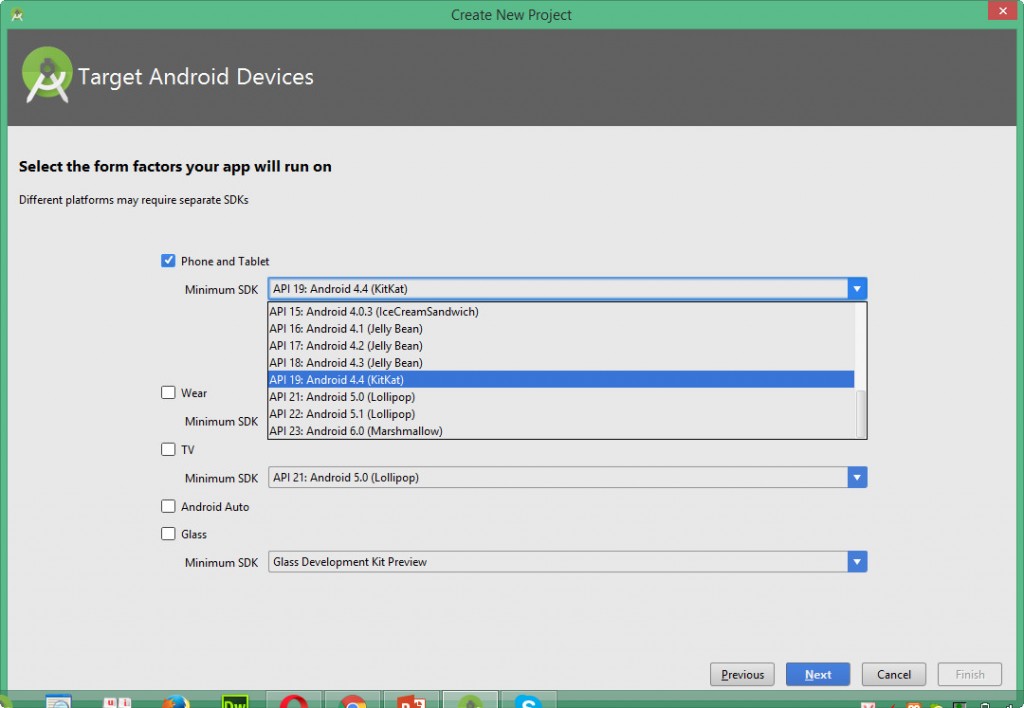
Chọn Phone and Tablet -> lựa chọn Minimum SKD -> Next
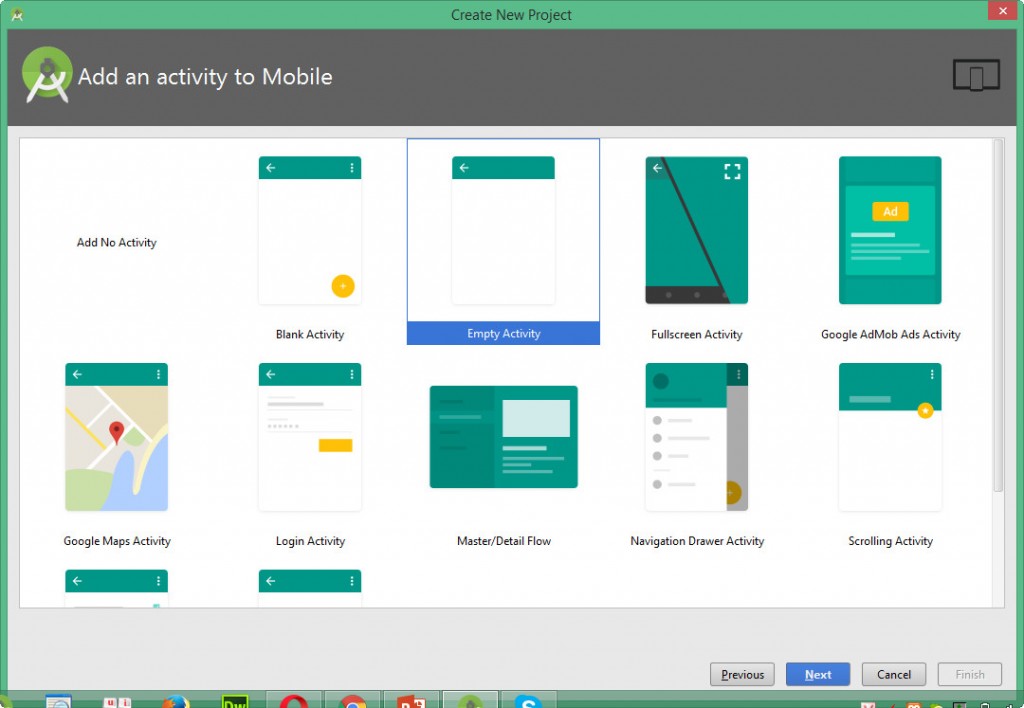
Chọn Empty Activity -> Next -> Finish
Cấu trúc project
AndroidManifest.xml
Nơi khai báo các Activity trong ứng dụng.
Qui định Activity nào thực thi đầu tiên
<intent-filter>
    <action android:name="android.intent.action.MAIN" />
    <category android:name="android.intent.category.LAUNCHER" />
</intent-filter>
Cấp quyền cho ứng dụng như quyền truy cập internet, quyền ghi thẻ nhớ, …
<uses-permission android:name="android.permission.INTERNET"/>
MainActivity
Mỗi activity tương ứng với một form
Là nơi viết code bằng java
Câu lệnh setContentView(R.layout.activity_main); dùng để chỉ định layout
package gsth.gsthapplcation;
import android.support.v7.app.AppCompatActivity;
import android.os.Bundle;
public class MainActivity extends AppCompatActivity {
    @Override
    protected void onCreate(Bundle savedInstanceState) {
        super.onCreate(savedInstanceState);
        setContentView(R.layout.activity_main);
    }
}
Khu vực res
build.gradle (Module: app) trong Gradle Scripts
Qui định phiên bản SDK
Khai báo thư viện sử dụng
apply plugin: 'com.android.application'
android {
    compileSdkVersion 23
    buildToolsVersion "23.0.1"
    defaultConfig {
        applicationId "gsth.gsthapplcation"
        minSdkVersion 19
        targetSdkVersion 23
        versionCode 1
        versionName "1.0"
    }
    buildTypes {
        release {
            minifyEnabled false
            proguardFiles getDefaultProguardFile('proguard-android.txt'), 'proguard-rules.pro'
        }
    }
}
dependencies {
    compile fileTree(dir: 'libs', include: ['*.jar'])
    testCompile 'junit:junit:4.12'
    compile 'com.android.support:appcompat-v7:23.1.1'
}
Giới thiệu về lập trình Android – Biên dịch và chạy ứng dụng
Tạo thiết bị ảo (Emulator)
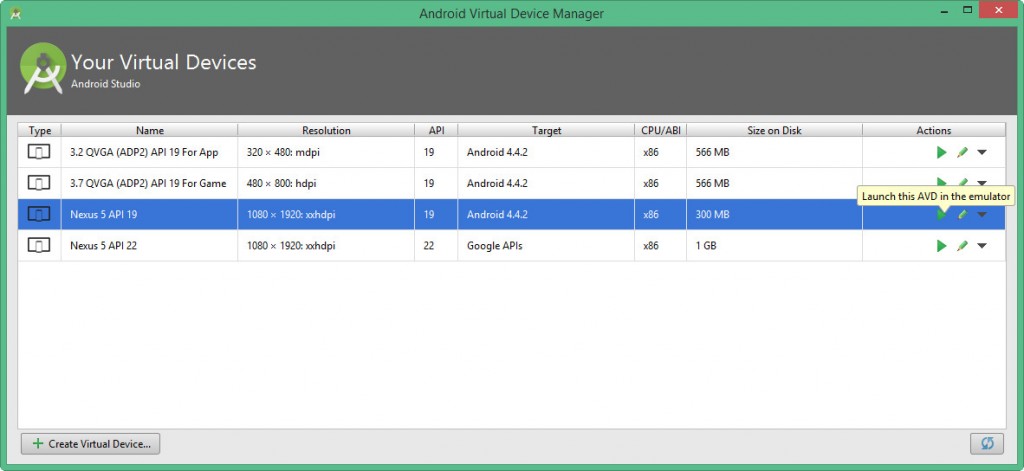
- Chọn AVD Manager
- Chọn Create Virtual Device…
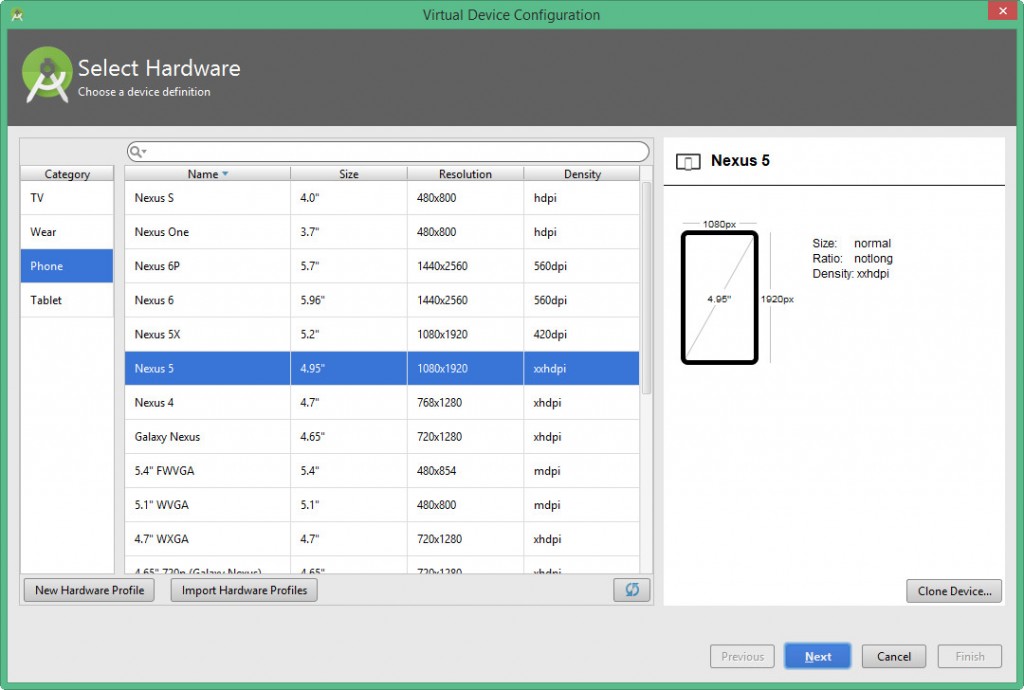
- Lựa chọn thiết bị -> Next
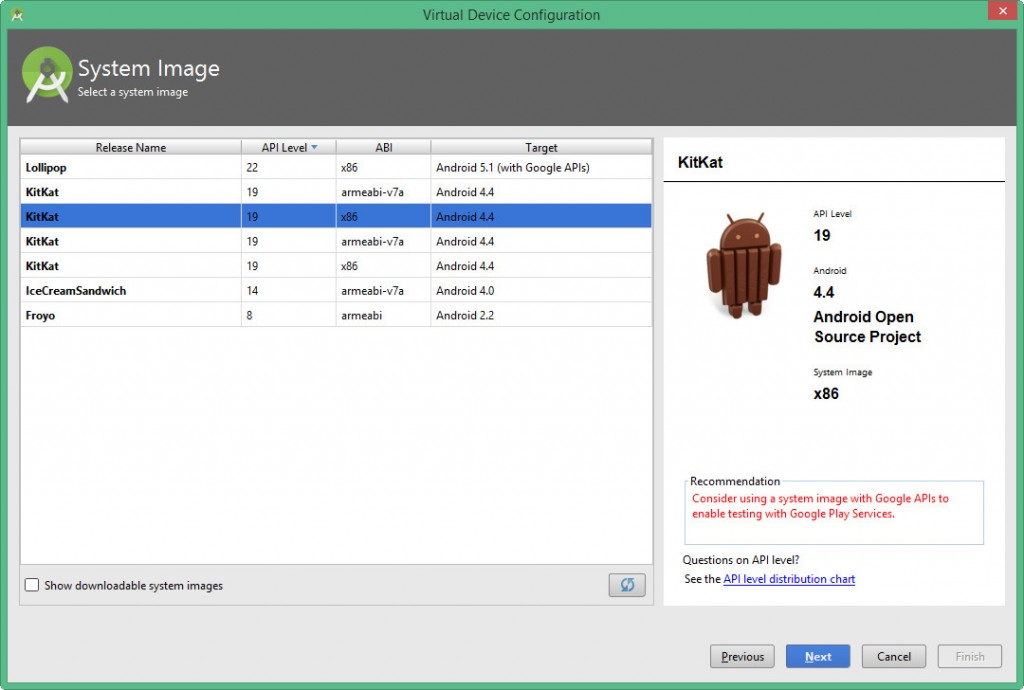
- Lựa chọn phiên bản Android -> Next -> Finish
- Chọn Lauch this AVD in the emulator (biểu tượng play) để khởi động thiết bị ảo
- Thiết bị ảo (emulator)
Build và Run
- Chọn biểu tượng Run ‘app’ hoặc nhấn tổ hợp phím Shift + F10
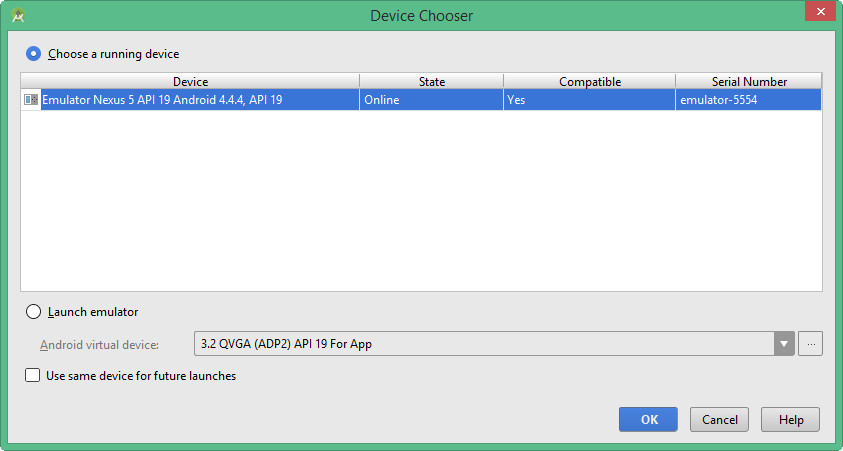
- Chọn thiết bị ảo -> OK
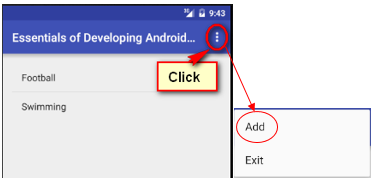
- Ứng dụng đã được thực thi
Giới thiệu về lập trình Android – Bài tập thực hành
Bài thực hành số 1: Cài đặt môi trường lập trình Android với Android Studio
Bài thực hành số 2: Tạo mới project
Bài thực hành số 3: Tạo thiết bị ảo, build và thực thi ứng dụng

